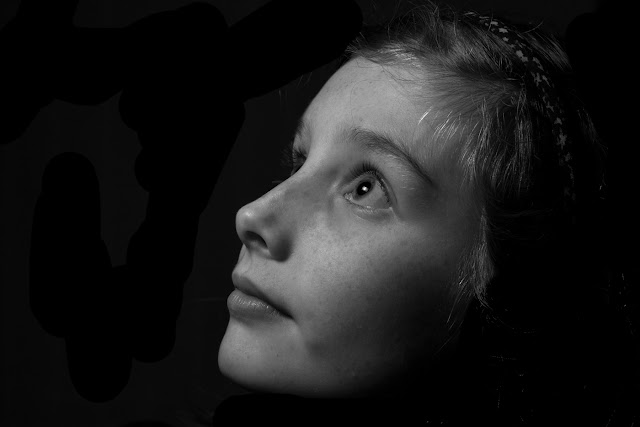
I've started working on using my off-camera flashes to take portraits - this is, I have to admit, very much a learning process for me but I do feel like I'm getting somewhere with it. This week, I tried out two different set ups and techniques which give very different results. Shots 1,2 and 3 were taken on a Nikon D800 with a Nikkor 60mm f2.8 lens
The first set-up was using a basic clam-shell approach to lighting.
1
Self Portrait
This used a black backdrop. The lighting was one Nikon SB-700 flash above the camera and pointed down onto the face at roughly a 45 degree angle. An Interfit Strobies softbox was used to modify the flash. Underneath was a gold reflector also angled at 45 degrees towards the face. This was shot with the flash on TTL mode and camera settings were 1/160, f8 and ISO 100. Plus points about this approach are the even lighting, lack of shadows, catchlights in the eyes and making the subject "pop" from the background. This is very easy to do and produces very pleasing results.
The second approach I wanted to try was using high-speed flash sync (or auto fp on Nikon cameras) to take some more contrasty black and white shots.
2
Ellen
This shot used the flash as in the first shot - up above the camera pointing down onto the face (but with no reflector underneath). The flash was set slightly further back to "feather" the light falling on Ellen's face. As I understand it, feathering reduces the light as you're only getting the reduced light from the edge of the flash burst. Interestingly, this was taken in my rather cluttered and untidy living room, with no backdrop used. The very short burst of flash was enough to light Ellen's face but the light fell off very sharply, leaving the background under-exposed. The camera was set to 1/2000 f8 and ISO 100.
3
Sarah
The same camera settings, with the light placed up high to the left and again pointing down. As above, the face is lit really well, but the background is pretty much pure black.
The plus points with this approach are more dramatic shots, greater contrast between light/dark areas, no softness (due to high shutter speed) and it means you might not actually need to use a backdrop.
The next evening, I broke out a nifty little honeycomb grid for my flashgun. I've never used one of these before and wasn't sure what to expect. Just to add to the "let's see what we get" approach, I also stuck my 70-200mm f2.8 lens on the camera. The shots below were all taken with the flash and honeycomb slightly above Sarah and off the the left of the camera. Settings were 1/250, f5.6 and ISO 100 with the flash on TTL mode. Again, I wasn't using any backdrop here - the highly directional nature of the honeycomb seemed to light the subject (Sarah's face) with no spill over onto the background, probably because of the angle of the flash.
4
5
6
7


HI DAD we love you're photos! And we are first to comment on your blog too!
ReplyDeleteIt's nice to get a comment and such a lovely compliment as well. I'm lucky that I have such great models to work with!
Delete